Help for Okta configurator for Skyhigh
With Okta’s release in early June 2017 a new feature was introduced to allow customization of the Login URL for the Office 365 Application template in Okta.
This feature allows changing the destination URL where the SAML response will be sent from Okta to Office 365 and supports defintion of a Skyhigh reverse proxy URL to leverage Cloud Access Policy, Device Control and other Skyhigh functionality.
The benefit of this new feature is mainly that there is no longer the need to manually setup and Office 365 application okta using SAML 2, but the Okta built-in Office 365 temaplte can be used, that support automatic configuration, user provisioning etc. As this is using WS-FED / SAML 1.1 there is no need to exchange SAML certificates or to configura anything on the Skyhigh side. It is also no longer needed to manually exeute Powershell scripts to enable federation as this is done by Okta as part of their integration to Office 365.
For
additonal safety, please in-validate / delete the Okta API token after you
finished using this tool.
How to use this tool
Once Office 365 is configured as an application in Okta this tool will use an API connection to Okta to modify the Login URL to point to the Skyhigh Reverse Proxy.
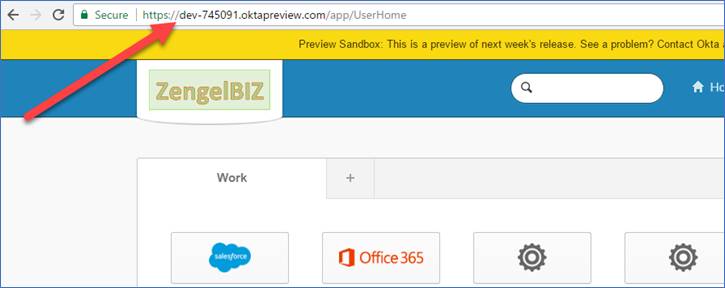
1.
Get your Okta URL by logging into Okta and
copying the URL from the browser:
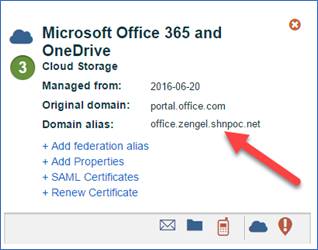
2.
Get the Skyhigh reverse proxy URL from Skyhigh
dashboard for you Office 365 service
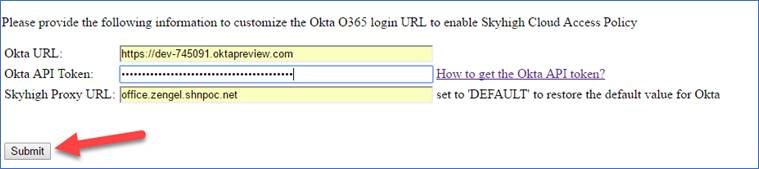
3.
Enter the information into the required fields
and click „Submit“
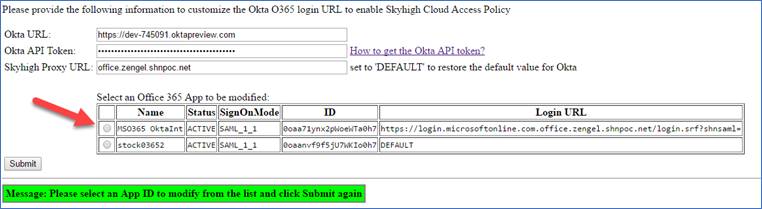
4.
The tool will then list all Office 365 Apps configured
for this Okta tenant. Select the app that you want to change and click „Submit“
5. The URL will be changed.
6. If you want to revert it to the default setting, then enter the string „DEFAULT“ int the field Skyhigh Proxy URL and apply the changes, this will reset the URL to the default URL and will bypas Skyhigh
Pre-requisites
· You will need to have Office 365 configured in your Okta instance and working. To do this follow the Okta deployment guide to configure Office 365 with Okta.
· Overview of setting up O365 in Okta:
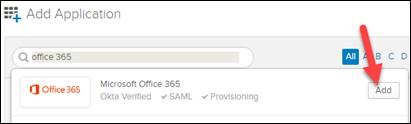
o In Okta go to Admin – Applications
o Click „Add Application“
o
Serach for „Office 365“ and select the
„Microsoft Office 365“ app, and click „Add“
o The follow the wizard to configure it
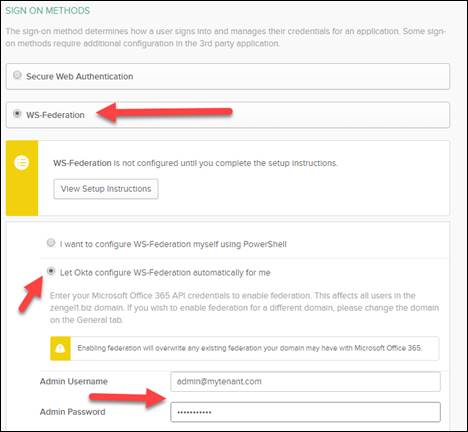
o
In the step to configure „Sign On Methods“,
select „WS-Federation“ and „let Okta configure WS-Federation automatically for
me“
· For a lab setup where directory sync is not used, make sure your users have an „ImmutableID“ configured. This is requirement for SSO in general and not specific to the Skyhigh integration
· Ensure that the login to Office 365 works as desired before continuing with the integration of Skyhigh.
·
Setup Office 365 reverse proxy service in your
Skyhigh tenant:
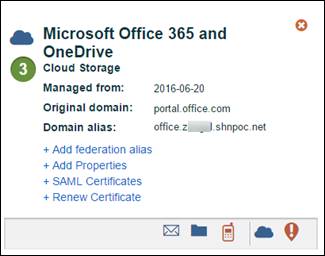
· Ensure the login to Office 365 works as desired when manually navigating to your Skyhigh reverse proxy URL, e.g. at https://office.<tenant>.shnpoc.net
· You will need to get an API token from Okta that has the permission to edit Apps
o General Information on API tokens for Okta: https://developer.okta.com/docs/api/getting_started/getting_a_token.html
o For lab and POC usage, you can create an API token for the Administrator account you have in Okta
o
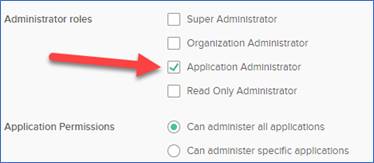
For deloyments at customers or in production, it’s
possible to create a new Okta Admin User with the following permission and then
create an API token under this user. This allows to use token with least
privilege for this tool
o You should delete the API token from Okta once the configuration is done
o
An Okta API token is disabled automatically if
it’s not used for 30 days